|
|
||
|
|
|
|
|
|
|
|
||
|
|
|||
| |||||||||||||
M2 Performance Coil-Over KitI decided to get some GAB superR shocks and a coil-over kit from M2 Performance. Converting the shocks to coil-overs takes a little work, so I decided to share the procedure I used. I basically just followed directions from M2, but since you have to modify your new shocks I thought this might be useful information to anyone who is considering or just made a similar purchase. This is actually easier than it looks and way easier than I expected. Doing all four shocks only took about an hour. Step 1: Remove the stamped steel spring perches.These are just pressed on and they are easy to remove with a rubber mallet or a regular hammer. I placed the top of the shock against the edge of the table to avoid stressing the shaft. Be sure to rotate the shock as you hit it so that the spring perch comes off somewhat straight.
Step 2: Remove material to increase ride height adjustability.If you remove some of the metal band that the spring perch was pressed onto, the threaded section from the coil-over kit can sit low on the shock allowing more useful adjustability. This is most important on the rear shocks. I did not get very good pictures of this. What you see below is a shock with about 1/4" of the band removed. The next picture down is the tool I used to cut the metal band. I think it is a pipe cutter. It has a chain with some cutting wheels on the inside. You turn the end of the handle to deepen the cut and then turn it around the shock. After a few rounds of tightening and turning, you'll be through the band, but it won't just spring loose unless you already cut the slot in the side (see below). Once the band is cut, I used a Dremel tool to carefully cut the band off. Sometimes it is hard to tell how deep you are, when using the pipe cutter or using the Dremel, so go slowly to avoid ruining the shock. I cut a few of mine a little deeper than I would have liked to, but I don't think it will cause any problems. You can also use a hack saw to cut the side of the band to remove it. It might be a good idea to start a groove with the pipe cutter, and then stop to cut the side of the band halfway through. Then resume using the pipe cutter until the band is loose.
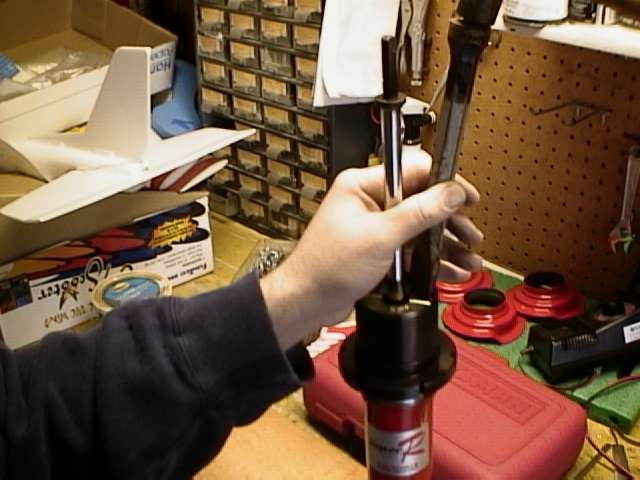
Step 3: Remove the cadmium-plated top thingy.In order to slip the threaded sleeve over the shock, you will probably need to remove the cadmium plated thingy at the top of the shock. I say probably because the sleeves almost fit over these things. But, they are easy to remove and reinstall, so don't waste your time trying to avoid their removal, just knock them off and make it easy on yourself. I used a big, blunt cold chisel and a hammer. These come off pretty easily with a few taps.
Step 4: File the weld.You will need to file the weld at the top of the shock so that the sleeve will fit over it. This step doesn't take nearly as long as I first imagined it would. Just knock off the big stuff with a few strokes and then try the sleeve. If it doesn't fit the first time, do a few more strokes and try again. Mine always fit on the second try. This step does not require much precision, and it is fairly obvious what parts of the weld stick out by sliding your hand over it or taking a look. The first picture below shows how I used a little block of wood to keep the file in the right spot. I tilted the file slightly to minimize unnecessary contact with the shock body to focus my efforts on just the weld. The next two shots show about how much filing is necessary.
Step 5: Reinstall the cadmium-plated thingy.Now that you have the threaded sleeve on the shock, you need to reinstall the cadmium plated thingy that you removed in Step 3. I placed the piece back on the top of the shock and then tapped it down straight into the threaded sleeve using a hammer and blunt cold chisel. be careful to avoid damaging the shaft with an errant blow. Circle the shaft as you tap it into place so it goes in straight. You'll probably feel when it bottoms out. Look at one of the other shocks with the piece still installed if you need additional convincing of when you are done.
Step 6: Final AssemblyThis isn't so much an instruction, but rather a few notes about final assembly:
Here are some pictures of the assembled units, minus the bump stops, with the ride height set poorly, and with a few of the top mounts switched:
Step 7: Install these into the car. |
|
The information on this page is Copyright © 1999-2002 Max
Cooper |